Disclaimer: Any views expressed by individuals and organisations are their own and do not in any way represent the views of The Heritage Portal. If you find any mistakes or historical inaccuracies, please contact the editor.
Field Marshal Bernhard Law Montgomery, nicknamed “Monty” by his men, commanded the Allies 21st Army Group in Northwest Europe, during the last months of the Second World War. On the 4th May 1945 at Luneburg Heath he accepted the unconditional surrender of the German forces in that theatre of the War. Victory in Europe (VE day) would come four days later on the 8th of May 1945.
In an attempt to stem the Allied advance Hitler ordered the destruction of all the bridges across the River Rhine and by the 7th March 1945 all bridges had been demolished except for the Ludendorff railway bridge (with a steel latticed arch over the navigation channel) at Remagen, south of Bonn. The bridge was detonated but not all of the explosives were triggered and the bridge was only partially damaged and did not fall into the river; this allowed troops of the American 9th Armoured Division to take the bridge intact, but nevertheless it would collapse 11 days later, killing 28 and injuring many more. Even though the Americans were able to establish a bridgehead at Erpel, on the eastern bank and had sent many troops across the bridge prior to its fall, the main push across the Rhine was always going to be left to Montgomery, as overall strategy had long been decided upon.
The Rhine flows 825 miles (1320 km) down from the Swiss Alps to Rotterdam (where it is called the Waal), there it has its outlet into the North Sea. The river is a natural moat and General Dwight D. Eisenhower, the Supreme Allied Commander, insisted on a broad front so that by the time all of his divisions had reached it there would be no pockets of German resistance behind them.
The breach made at Remagen not only lowered German morale but it also forced them to divert vital units, away from the crucial northern sector, which was where the intended main thrust of the Allied assault, under the command of Montgomery would be (Operation Plunder). True to form “Monty” waited until he had all his detailed plans in place before unleashing his attack, which began on the night of the 23rd March. Prior to the attack the town of Wesel was bombarded until there was hardly a building left standing. Under a smokescreen there was an amphibious crossing of the river by the British and Canadian soldiers of 21st Army Group, which was followed up in the daylight of next day by a parachute drop by the American XVIII Airborne Corps, with the aim of reinforcing the bridgeheads (a reversal of the deployment used on D-Day).
As soon as the infantry and paratroopers had secured the bridgeheads on the eastern bank there came hard on their heels the engineers and sappers to construct the ferries and pontoon bridges needed to get the tanks, artillery and heavy equipment across.
The problem of getting across the Rhine, without getting one’s feet wet was solved by an ingenious temporary bridge that could be assembled from a kit of small lightweight components with manpower and the aid of the least amount of lifting tackle – in essence a full size Meccano set. This bridge was called a Bailey Bridge and after the war “Monty” was full of praise for it when he said, “Bailey bridging made an immense contribution towards victory in World War II. As far as my own operations were concerned, with the Eighth Army in Italy and the 21st Army Group in Northwest Europe, I could never have maintained the speed and tempo of forward movement without large supplies of Bailey bridging”.
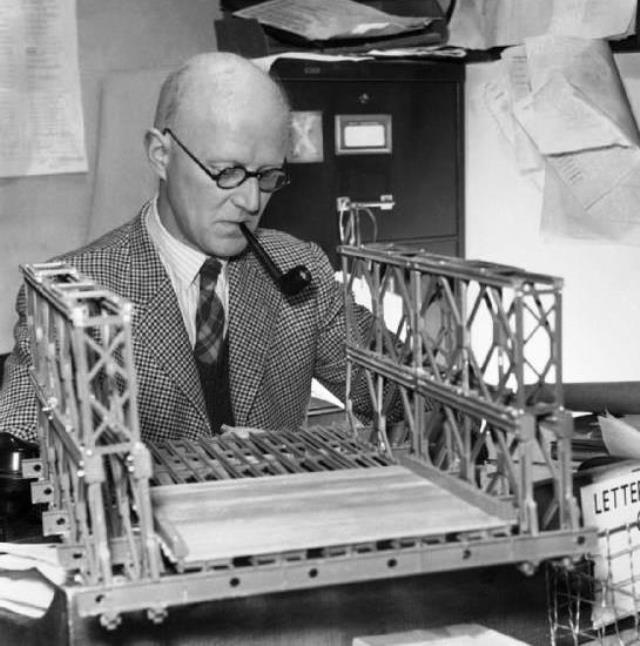
The Bailey Bridge was the brainchild of Donald C. Bailey (later Sir Donald, knighted in 1946) who was a civilian Civil Engineer working for the British Army at the Experimental Bridge Establishment (EBE) of the Royal Engineers, experimenting and testing portable assault bridges developed from those used in the First World War; notably the Inglis type (Marks 1 to 3). He started work at EBE’s barracks in Christchurch, Dorset in 1928, and at one stage he must have wondered whether he had done the right thing as the defence cuts of the early 1930’s trimmed down his compliment of staff to seventeen (14 in the workshop, one draughtsman, a R.E. officer and himself). There was even a Treasury memo written entitled “Is Mr. Bailey really necessary?”
D C Bailey, pipe in mouth, sits in his office and examines the model of a Bailey bridge which is resting on his desk (Imperial War Museum via Wikicommons)
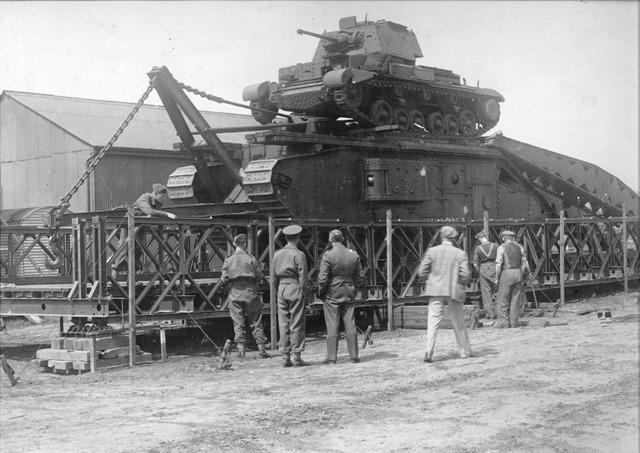
Well history has proven that he most certainly was, as the bridges that carried his name also carried the heavy military hardware that won the War. With new tanks being deployed at the outbreak of the Second World War (the Matilda and the Churchill) it was soon realised that the existing portable assault bridges would not be able to carry their weight and therefore it was futile to develop them further. With this daunting problem in mind, Donald Bailey put on his thinking cap and literally on the back of an envelope sketched some ideas whilst on a journey back to base, in late 1940. A brief of a 40 ton load was given and it would be only a matter of months before a prototype was being tested and barely a year when operational army units were being supplied with the Bailey Bridge; a testament to how things can be speeded up in times of war. The Bailey Bridge was first used in the North African Campaign and thereafter in Italy and with the American Army sold on it, it was produced in vast quantities Stateside. They even called it by a different name – Panel bridge M1, Bailey Type. They say that imitation is the sincerest form of flattery and the Americans developed the bridge further still by introducing the M2 version, which had a wider roadway which remains to this day as the United States army’s foremost assault bridge.
Bailey Bridge Static Load Testing (Red House Museum via thinkdefence website)
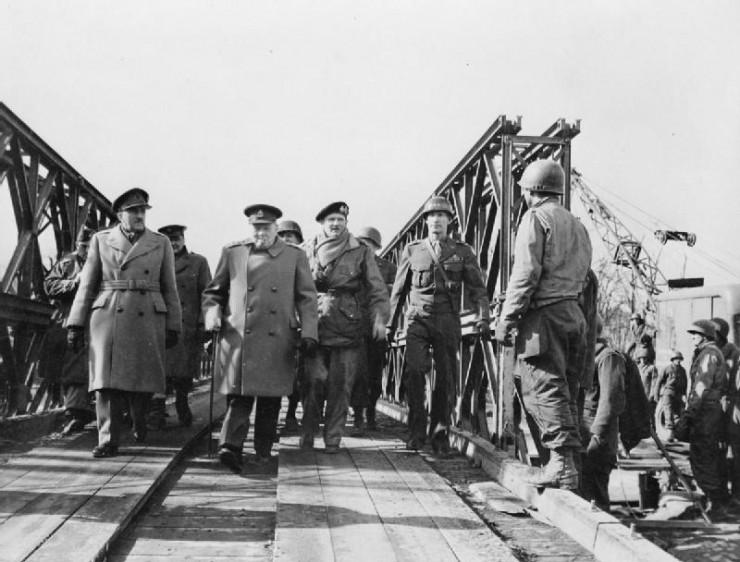
Churchill walks across the Rhine (Imperial War Museum via thinkdefence website)
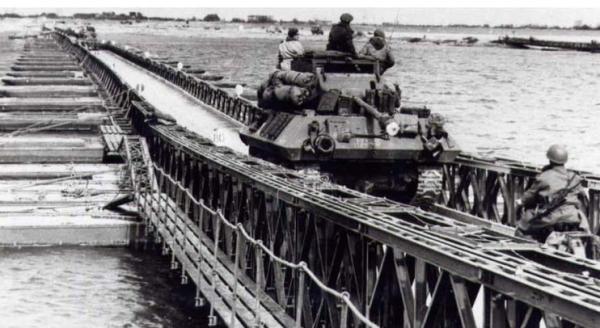
The Bailey Bridge’s finest hour came when the Allies stormed the Rhine. Several pontoon bridges were strung across the Rhine to support the Allied advance into the heart of Germany and they were given the names of bridges that spanned London’s River Thames. One in particular was built at Rees downstream from Wesel and close to the Dutch border and was given the name “Blackfriars Bridge” by the Royal Canadian Engineers of the 2nd Canadian Corps. This Bailey Bridge was the longest to be built across the Rhine and had a length of 1 814 feet (558 m) including the ramps at each bank. Work was started at noon on the 26th March, but delays occurred due to heavy fog and slow delivery of bridge components, nevertheless the bridge was open to traffic around mid-day on 28th March only two days after work had begun. The fully floating section of the bridge had 34 connected spans of 42 feet each plus one extra of 32 feet and was rated as a military load class 40 – sufficient for tanks to cross over.
Blackfriars Bridge - The longest Bailey Bridge (via Canadian Military Engineers Association website)
Now what is a Bailey Bridge?
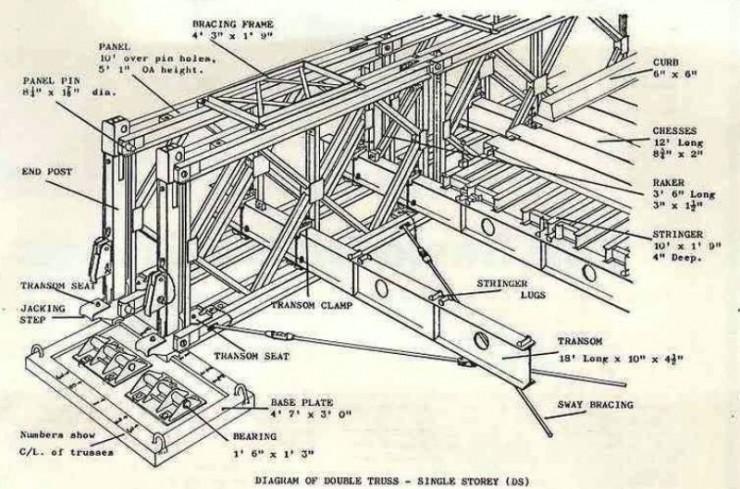
It is a simple through-type bridge, that is to say a bridge with a roadway carried between two main load carrying lattice girders (trusses). The lattice girders are built-up from a number of identical panels connected end to end by pins to form a continuous stiff girder from bank to bank. Road bearers, called transoms are laid across the bottom chords of the truss panels, connecting and spacing the main girders apart and at the same time carrying stringers (secondary members) to support timber decking (chesses). Since the bridges over the Rhine were needed quickly there was no time for building strong abutments, therefore the bridge was at a low level supported on floating pontoons that were equi-spaced across the river.
Bailey Bridge components (via thinkdefence website)
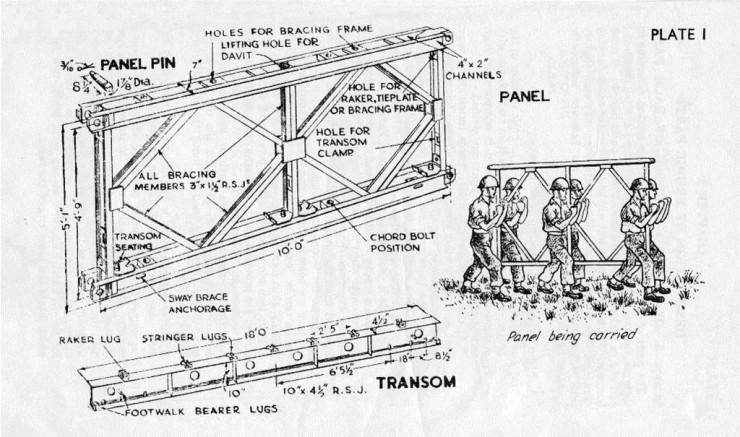
Although designed for the exigencies of wartime the Bailey Bridge has in the last 75 years proved its worth time and again in remote areas where transportation and lifting equipment is rudimentary. For instance one girder panel 10 feet long by 4 ft 9 in high (measured between pins) weighs 600 pounds which can be carried by 6 men.
Diagram demonstrating a six man lift (Red House Museum via thinkdefence website)
It is not the intention to go into great technical detail here as the references given below give a good account of technical matters, suffice to say there are bespoke manufacturers around the world that specialise in manufacturing and erecting Bailey Bridges – “Mabey Bridge Limited, UK” is one such company and they market their Logistic Support Bridge (LSB) system (using components from their Compact 200 range), which is based on the concept of the Bailey Bridge (Compact 100 in Mabey parlance) but has been brought up to date with an increase in depth to 7 feet and the use of steels with higher yield stresses than were used previously, which thus increase the strength as well as reduce the self weight of a bridge.
The South African National Defence Force (SANDF) has stocks of Bailey bridging that are running seriously low, which means that the bridge building programme for assisting rural communities in disaster support or in bettering their communication could be under threat. With this in mind Mabey Bridge (now represented in South Africa by ECM Technologies) gave a presentation at the 10th Defence Symposium held on 15th September 2016 at the CSIR International Convention Centre entitled “Mabey Logistic Support Bridge: Essential Military Capability equally suitable for Civilian Emergency or Disaster Relief”.
It is imperative, not just for South Africa but for the whole SADC region to have a fast response to natural disasters and the Bailey Bridge has proved its worth in that department over the last seventy-five years, long may it continue to do so.
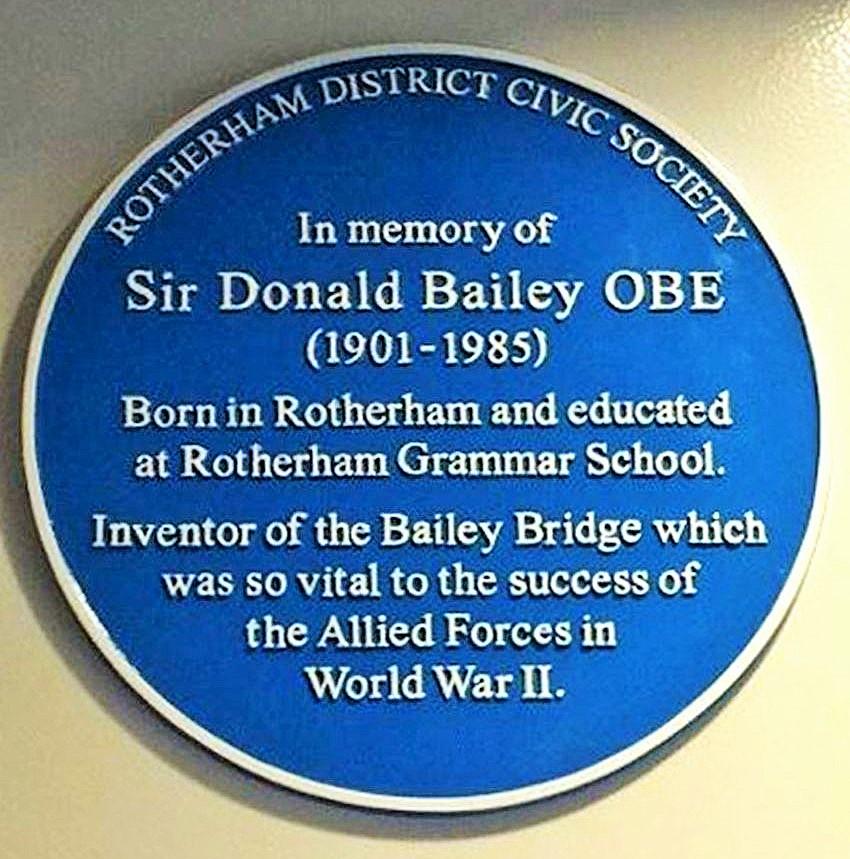
Blue plaque commemorating Sir Donald Bailey OBE at Thomas Rotherham College (wikicommons - Nora Platt)
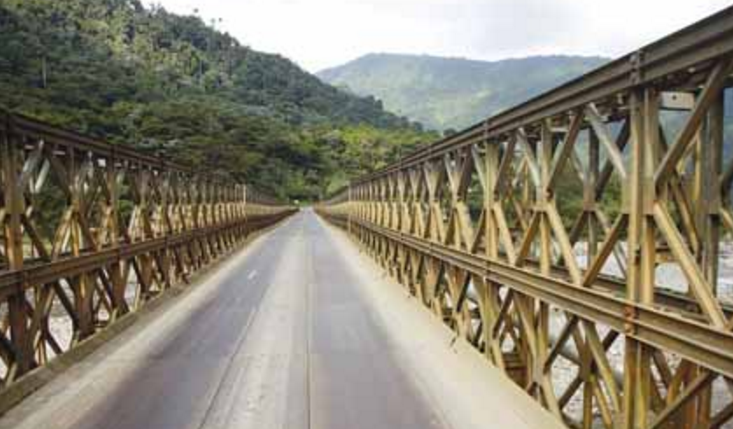
Main image via Dorset Life Magazine
References and further reading
- “March to Victory, the Final Months of WWII”, edited by Tony Hall.
- “Sir Donald Bailey’s Bridge - 150th Combat Engineer Battalion (of WWII)” (Google).
- “Temporary Solution” from the New Civil Engineer magazine 9 May 1991.
- “The Bailey: The Amazing, All Purpose Bridge” by Larry D. Roberts (Google).
- “UK Military Bridging – Equipment (The Bailey Bridge)” Think Defence (Google).
- “The Bailey Bridge” by John Theirry (Google)
- “Bailey-Uniflote-Handbook” fifth edition 1974 edited by Major J.A.E. Hathrell
- “Mabey Bridge Limited” website: www.mabey.com
Comments will load below. If for any reason none appear click here for some troubleshooting tips. If you would like to post a comment and need instructions click here.

